I myself use Blender, and this is a collection of things I wish I had known earlier.
For someone like me who is used to using Blender, this is an essential level, so please remember it.
Hide splash screen at startup
- Every time I start Blender, a strong splash screen appears and I get frustrated when I start working. (Displayed like an advertisement.)
- Hide this screen.
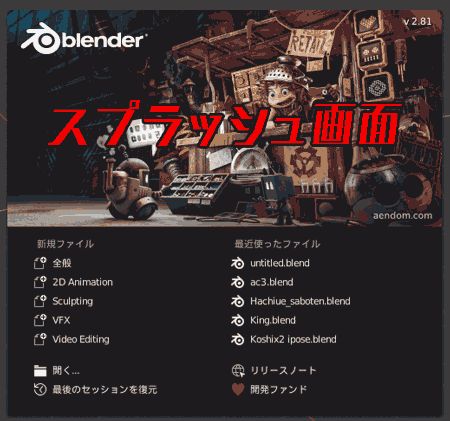 |
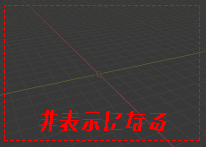 |
|---|---|
| Change before | After change |
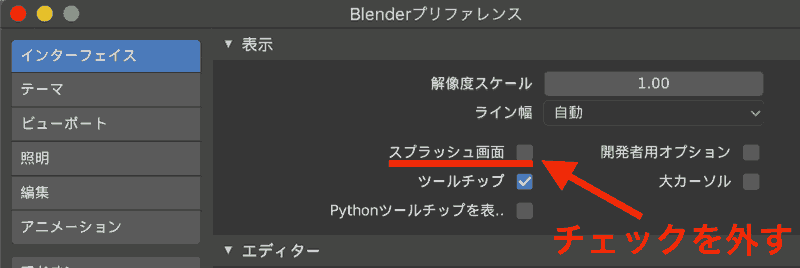
How to set to hide the splash screen
Edit > Preferences > Interface > Display > Uncheck Splash Screen.
It will be reflected when Blender is restarted.
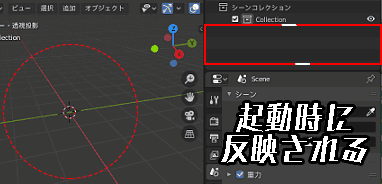
Eliminate the cube at startup from the beginning
Background
Just seeing this (cube) in the middle of the screen when starting Blender makes it difficult to start work.
When importing fbx, it overlaps with cube and fails.
I want to start with a blank screen and nothing on it.
If so, let’s erase the cube from the beginning.
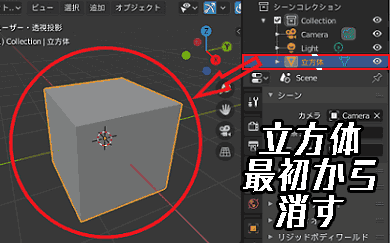 |
 |
|---|---|
| Change before | After change |
How to erase the cube from the beginning
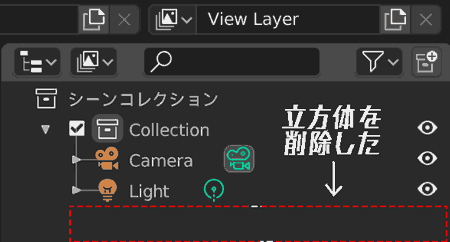
- Select the cube and delete it. Make sure there are no cubes in the outliner.
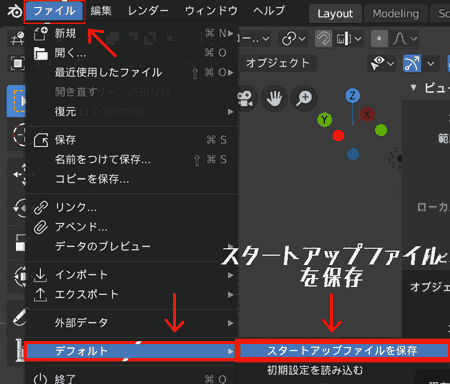
- Now click Save Startup File.
- Accomplished. From next time, restart Blender and it will be reflected.
 |
 |
|---|---|
| 1 | 2 |
Some people may want to delete the camera and light if they don’t use them. (Any)
Additionally, you can save the layout of Blender’s startup screen, so feel free to customize it to your liking.
For those whose property icon suddenly disappeared

It’s me. While I was working, the property icon disappeared.
I don’t remember intentionally hiding it. . .
How to display icons for disappeared properties
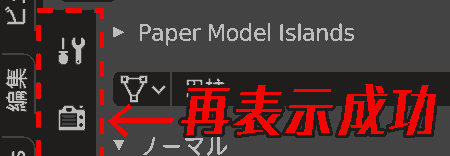
- If you zoom in and look closely, you will see a → (right arrow) mark, so pull it to the right.
- It was displayed.
 |
 |
|---|---|
| 1 | 2 |
Separate objects have been combined into a single object
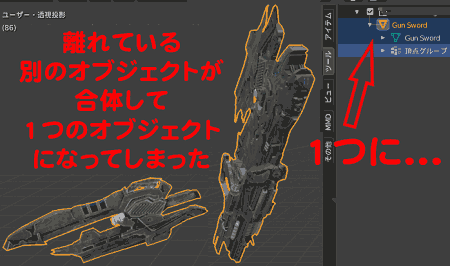
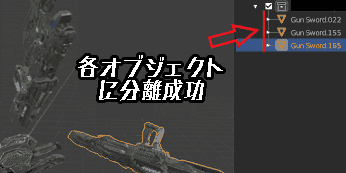
As shown in the image, two separate objects have become one object.
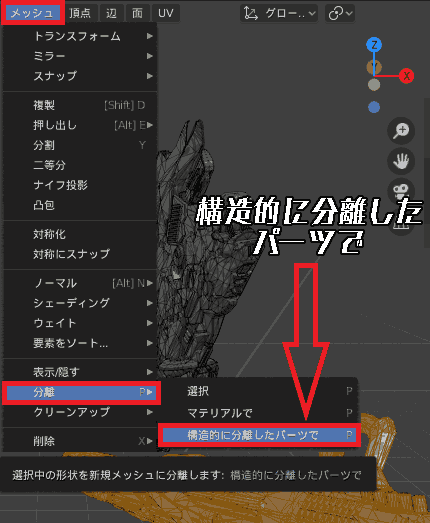
Object separation method
1. Select one of the targets in edit mode, even if it’s only roughly. (You don’t need to worry about the front side of the object; you don’t need to worry about the back side.)
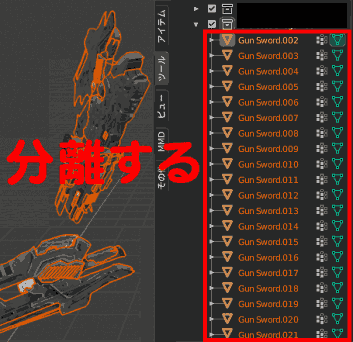
2. Then select Edit Mode, Face Selection, Mesh > Separate < > > on structurally separated parts.
 |
 |
|---|---|
| 1 | 2 |
Separation is successful.
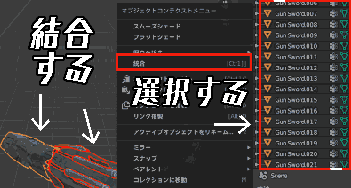
Object integration method
Then merge them into one object.
- Select each object in object mode and select faces and merge them.
- We are able to separate each object again.
 |
 |
|---|---|
| 3 | 4 |
How to delete vertex group
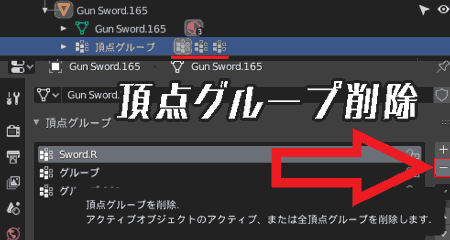
- You can delete them one by one by pressing “-” (minus) on “Vertex Group” at the top of the object data properties.
- It’s okay because the object will not be deleted.
- There is a way to perform bulk deletion using a python script.
Delete all vertex groups in Blender – keroxp’s Scrapbox
I successfully executed python and deleted all vertex groups. Please take responsibility for your actions.
Armature (bone) deleted
In Blender, bones are called armatures.
Deleting armatures (bones) requires some skill.
How to delete armature (bone)
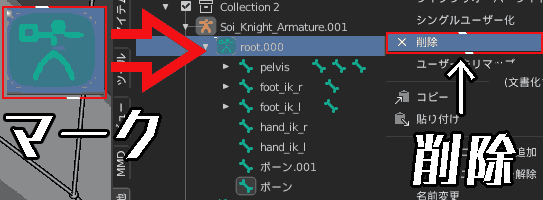
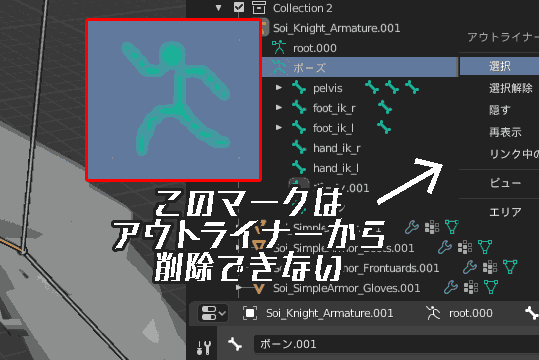
Select pose mode, root (sprawled person, skeleton) and delete.
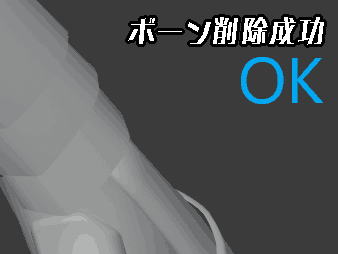
Then, all the target bones will be deleted.
Please note that in some cases, the entire object may be deleted. (with experience)
 |
 |
|---|---|
Edit mode, select bones, right-click > Delete Selected Bones.
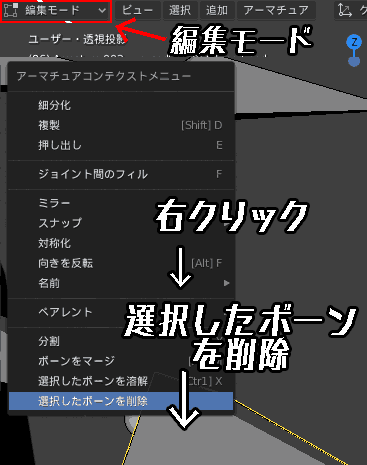
Now you can delete only the selected bones.
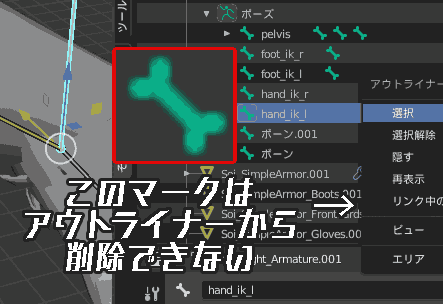
See an example where bones cannot be deleted
There is no “delete” option from these icons, so you cannot delete bones from the outliner.
 |
 |
|---|---|
| bone | 卍mark |
Armature (bone) type/display change
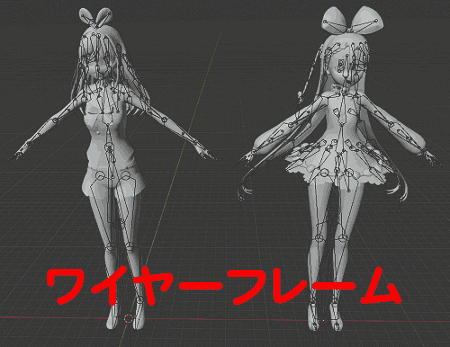
Background
Is it an old data format at first glance? I had doubts about this and had a reaction of rejection.
- The armature (bone) has a transparent wire frame shape.
- Therefore, we will show you how to change the type and display of armatures (bones).
Model used
- kizunaai.pmx (Kizunaai)
- alicia_solid.pmx (Niconi Solid-chan (Alicia Solid))
Conclusion It can be changed in the viewport display.
It’s easy to make mistakes, so this is how I remember it.
For convenience, it is expressed as follows.
- Bone appearance → Bone surface changes → Object properties
- Bone type → Bone shape changes → Object data property (卍)
It’s a complicated story, but I think you’ll understand once you try it.
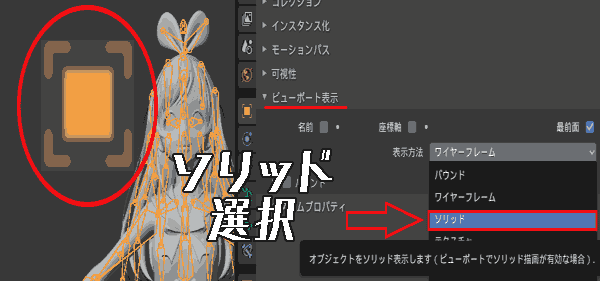
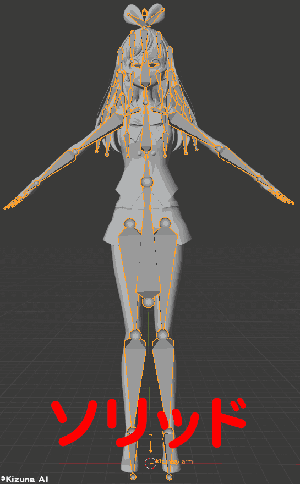
How to change the display of bones (appearance)
Change to the usual octahedral bone display.
- Shade the 3D view and set it to solid mode.
- Select the bone in object mode.
- Object properties > Viewport display > Wireframe → Solid
Also, the object properties and viewport display items are set like this. Setting items are in bold.
- Object properties → Name / Coordinate axis / Frontmost
- Viewport display → Bound / Wireframe / Solid / Texture
 |
 |
|---|
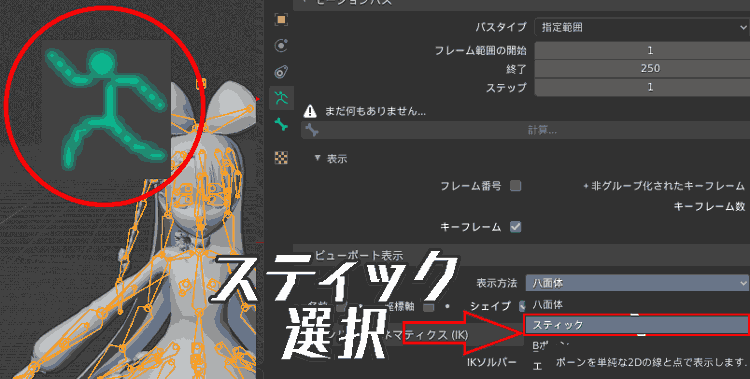
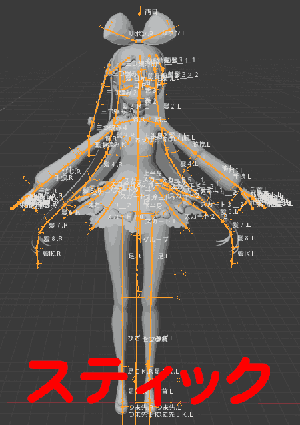
Bone display type (type)
- Change the bone shape from octahedron to stick.
- Shade the 3D view and set it to solid mode.
- Select Object Mode, Bone.
- Object data properties (swastika icon), viewport display, octahedron → stick.
- I checked the object data properties and viewport display items like this. Setting items are in bold.
- Attribute list → Name / Coordinate axis / Shape / Group color / Frontmost
- Display type (shape) list → Octahedron / Stick / B bone / Envelope / Wireframe
 |
 |
|---|---|
| Change before | After change |
- These settings allow you to change the shape of bones and display their attributes.
- In the initial state, it will be displayed like that (the usual octahedral bone) in pose mode.
- The information given differs depending on the type of bone. (Reference [1])
Operating Environment
This explanation assumes the following operating environment.
- macOS Mojave
- Windows 10 (Home / Pro)
- Blender 2.8 / 2.81 / 2.82 / 2.90
Lastly
The above is a list of all the things I encountered when using Blender.
I’ll be sure to add more if I run into any problems.
Reference
[1] How to display armature – wiki.blender
3D model used: ©︎Niconi Solid-chan,©︎Kizuna AI
